It’s springtime here in the Northwest corner of Washington State. Making cold frames for seedlings gives our garden a big jump-start! One of Dave’s latest garden inspirations is this greenhouse scrap cold frame he built for his garden seedlings.
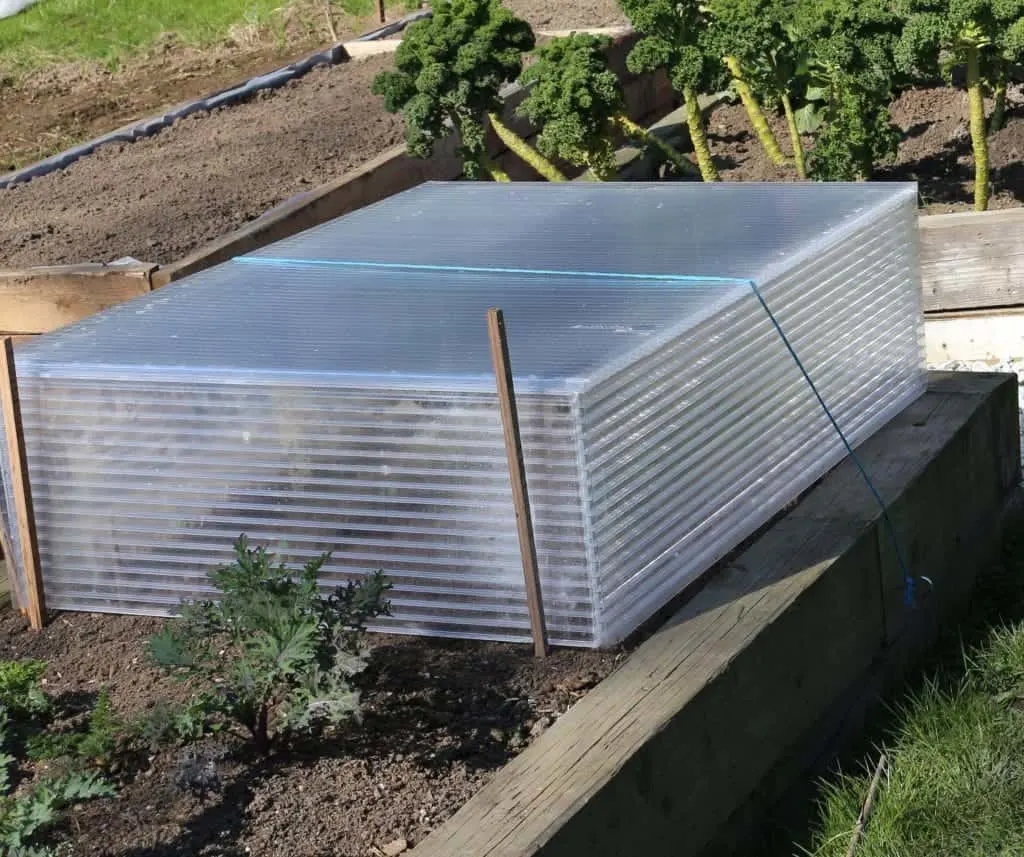
Cold frames protect fragile seedlings in cool early spring weather. Making cold frames for seedlings can be cheap and pretty easy. Use what you have!
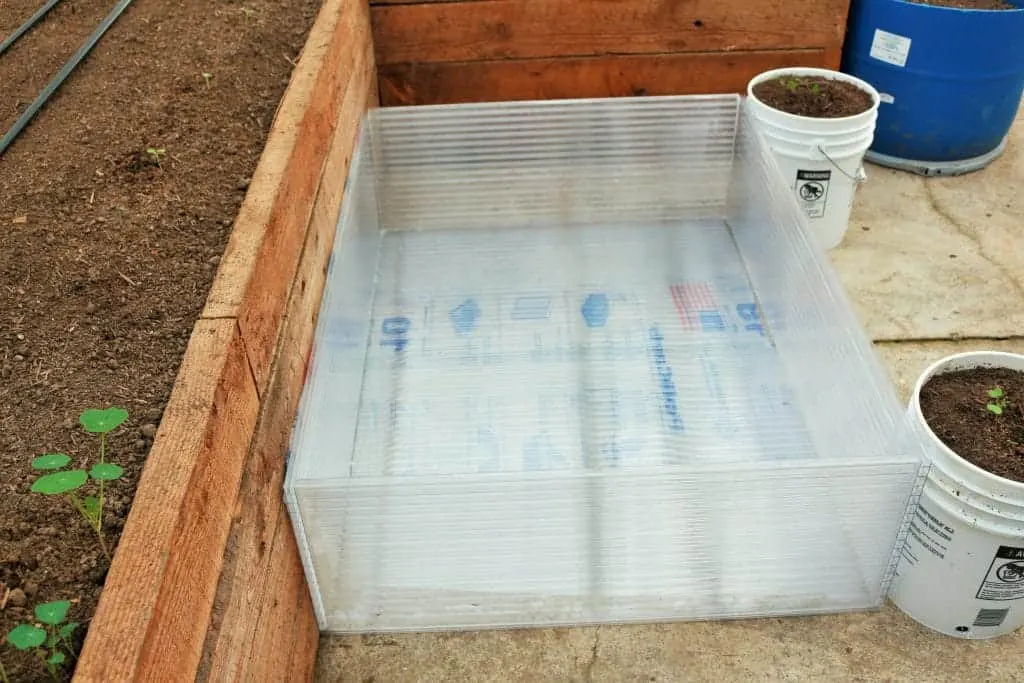
We built a greenhouse last year out of triple wall polycarbonate plastic. Dave found some leftover sections of the poly in his shop and decided it would make a great cold frame for his garden seedlings. He always protects his fragile garden seedlings with some form of cold frame. He has a cold frame made out of plastic someone gave him, and he’s used cut one gallon milk jugs for several years (and may again) to protect various crops from early spring frosts.
That is the biggest reason to go to the trouble of making cold frames. Frost can kill seedlings in one frozen morning. Where we live the frost is unpredictable and can catch us by surprise, and has many times.
We live in the north, where the sun is weak, early in the year. Our crops benefit from making cold frames for seedlings because the cold frames help increase the sun’s warmth to the tiny plants. Sometimes the crops get too warm in a spring hot spell so the cold frames do require monitoring to make sure they are helping and not burning your crops.
In the past we have tried old glass windows, but they break easily and that’s a tricky mess to clean out of your garden bed, and no fun to weed around broken glass either when you THINK you cleaned it all up! So be sure to support the frame well so no unexpected wind can knock them over. And glass reflects light so it can really burn the seedling quick!
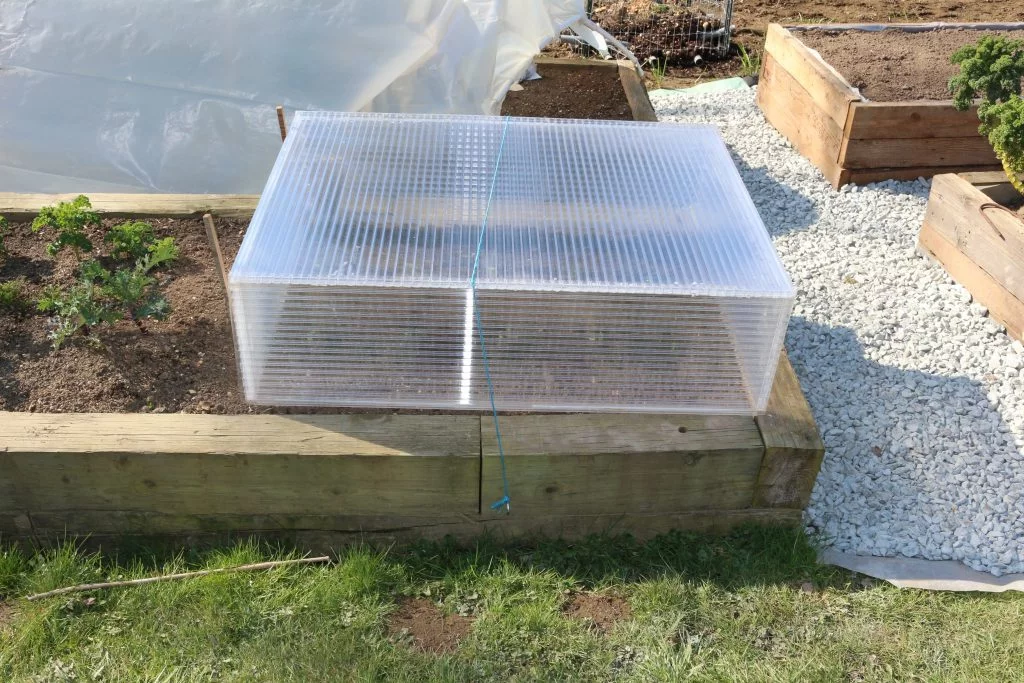
Triple wall polycarbonate diffuses light and protects the seedlings from frost. Notice Dave has tied the cold frame to his bed. This is to keep it in place in high winds. We do get some gusty weather in the spring and fall!
We are pretty excited about this cold frame. The triple wall plastic is good at heat retention and also light diffusion. That should help the seedlings get off to a good start and not get sunburned. If you live by a greenhouse panel manufacturer, or anywhere that sells greenhouses; see if they have scraps for free or very cheap.
Making Cold Frames For Seedlings
NOTE: THIS COLD FRAME WORKS GREAT FOR PROTECTING SEEDLINGS IN COLD WEATHER. BUT! You will want to be adding a venting system if you are using it in climates where the weather changes extremely throughout the day. Early spring is a great time for this cold frame or later in the fall.
For starting seeds in warmer late spring weather use a cold frame with top venting to protect the seedlings from too much heat during the day. Dave raises this cold frame up onto bricks or wood to help with air flow but a top vent would be even better.
Here’s how to make this easy cold frame:
- Find scraps large enough to make a cold frame (you want to make a size you can easily handle. Most greenhous shops have a scrap bin of leftovers from their greenhouse projects. that are either free or pretty close. Dave’s poly scraps were big enough to make a roughly 3 x 4 by 12 inch high cold frame.
- Measure and cut the sections to a size that works best for your garden bed and that you can easily handle.
- The pieces Dave used were approximately:
- 2 long sides sections of 12″ x 48″
- 2 short sides of 12″ x 36″
- one top piece of 48″ x 36″
- The pieces Dave used were approximately:
- He cut the sides to the length of his top, and then he used silicone sealer to glue the sections together.
- He put the sections together in two days.
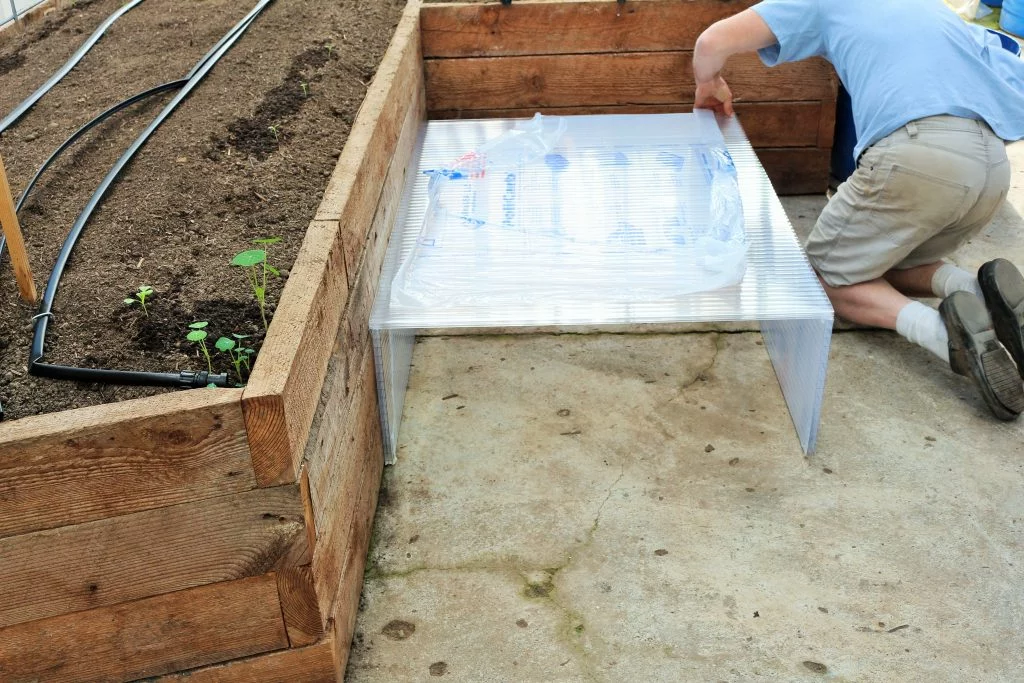
As you can see, he put two opposite sides together the first day and let it dry overnight.
- The next day he glued the other sides on and braced the cold frame with a couple of his five gallon growing buckets and let it set up in his warm greenhouse.
It worked great, the silicone held it together fine. We put it on the raised garden bed and he drove two small stakes into the dirt and tied a rope over it for wind support. Viola!
Here’s my idea on how to build this cold frame with a top vent. We have not done this! But I’m thinking our next cold frame project we will! If you follow these directions let me know how it works for you!
Making cold frames for seedlings with a top vent:
- cut two pieces for the top instead of one sized this way:
- Make one piece flush to the side walls and about 12″ wide so for Dave’s project 12″ x 48″
- cut a piece with a 1/2 ” overhang (for easy grabbing and propping later) Dave would need a piece 49 x 36 1/2
Assemble the cold frame with top vent like this:
- Put side walls all together with silicone all at once and brace them square until set. If you think it’s too flimsy find small pieces of wood or extra poly and cut triangles to glue into your corners for added strength.
- Once the side walls are square and set up add the 12″ piece of poly top to the cold frame. It should be flush with the sides and sit all the way to the back of the side walls so there are no gaps. Glue it onto the side wall and Let it completely set.
- Now add the oversized piece of top and fit it with 1/2 inch of overhang all around.
- Find or purchase flat hinges for the top. Place two to four hinges on the top so the top opens easily. These may also have to be siliconed on
- To use this hinged top you will need to prop it open to gain the venting option you require for whatever heat conditions you are experiencing. a small stick should work fine. Good luck!
Making cold frames for seedlings does not have to be expensive or a lot of work. It is a really good idea to protect your tiny plants! To read more about Dave’s various spring projects go here. He always puttering around the place 🙂
Note: This cold frame is now in it’s second year and is still in great shape. Go find some greenhouse poly scraps!

Caroline
Saturday 27th of May 2017
Hi, Dave, I will be heading for the hardware to find some of this polycarbonate stuff. At the moment I am using some wire shop shelves I skived from someone who was throwing them out and I cover them with regular clear plastic. They are big enough for 8 lettuces each or other seedlings and I hothouse lots of veggies from the cold/frost here in South Australia. I need something a bit higher so may even use your idea to add some height to my system. I need to work out how to easily let in the air for warm unseasonal weather. Thanks
Diane
Saturday 27th of May 2017
Hi Caroline, Your climate is so different from ours. This cold frame works really well in the cold frosty nights. He recommends putting it on at night and then removing it when your weather heats up a lot during the day. Fortunately, it's very lightweight and easy to move. We still use ours after these three years it is still in great shape. He stores it in his shop off season. It does need venting to allow hot air to escape. He props the cold frame up so cool air can come under the bottom of the frame if heat starts to build up. If you are dealing in huge temperature variations, this one may burn your plants if left on unattended. Best of Luck and Happy Gardening!
Fall Garden Chores - Homemade Food Junkie
Thursday 29th of October 2015
[…] way to grow potatoes(since he had to replace a tractor tire rim and tire), and you can see this cold frame back in business protecting the cooler fall weather seedlings (kale right now). Dave also made […]
Joanne T Ferguson
Saturday 25th of April 2015
Love this Diane and what a great idea! Thanks for sharing it with the Say G'day party! Pinned all and hope to see you on Saturday!
homemadefoodjunkie
Sunday 26th of April 2015
Thank you Joanne, This cold frame was easy to build and works like a charm. It should last for years and years! I will be pinning to your party this week end. Thanks so much for hosting it!
Sharon - Her Organized Chaos
Wednesday 25th of March 2015
This sounds so easy! I need to make this for my garden. Pinning! Thanks for sharing this at Totally Terrific Tuesday last week! Can't wait to see what you have lined up for this week.
Sharon Her Organized Chaos
Susie
Sunday 8th of March 2015
This sound easy enough. I'm gonna try it.
homemadefoodjunkie
Sunday 8th of March 2015
Oh yay! All you need is some scraps and silicone sealer and time to let it set up. Easy project! And it's working great!